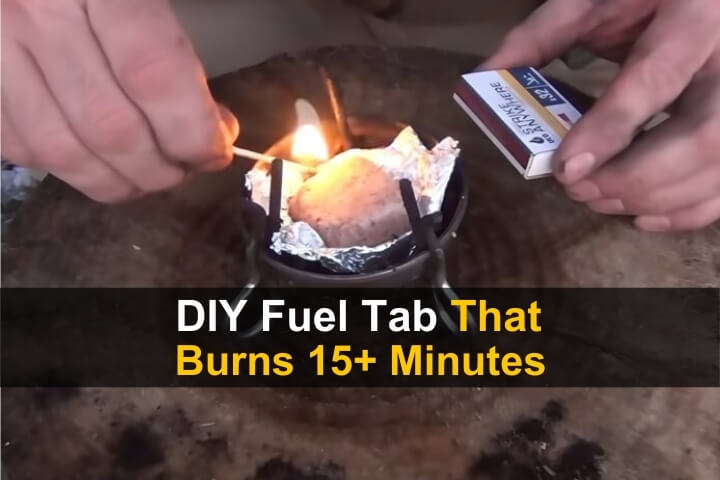
If you’re into camping, prepping, or just love having backup options in case of a power outage, you should check out these DIY fuel cubes. They’re easy to make and they’re dirt cheap compared to buying Esbit tabs or other commercial fuel cubes.
Plus, they work really well. You can use them for boiling water, starting fires, or heating up food whether you’re camping or dealing with a power outage.
These homemade tabs are made from a mix of wax, sawdust, petroleum jelly, and a few other common ingredients you can find at the store. This particular recipe comes from avideo by WayPoint Survival. You can view it below along with the written instructions.
Want to save this post for later? Click Here to Pin It On Pinterest!
What You’ll Need
Here’s everything you need to make your own fuel cubes:
- 1 cup of Gulf wax (or any paraffin wax — usually found in the canning section)
- ½ cup of sawdust (just sweep it up from a clean cut with a table saw, but avoid sawdust from treated wood)
- ½ cup of petroleum jelly
- ½ cup of fire paste (optional but recommended)
- 100% cotton jumbo cotton balls
- Silicone mold (ice cube tray size works great — about ½” x ½” x ½” deep)
- An old can (for mixing and pouring)
- Double boiler setup (so you don’t scorch the wax)
- Aluminum foil (cut into 4¼” x 4¼” squares)
- Ziplock bags (for storage)
Step-by-Step Instructions
Step 1: Melt the Wax
- Start by setting up a double boiler. Place the Gulf wax in the top pot and slowly melt it.
- While the wax is melting, get your other ingredients ready.
Step 2: Mix the Ingredients
- Once the wax is fully melted, stir in:
- ½ cup of packed sawdust
- ½ cup of petroleum jelly
- ½ cup of fire paste (if using)
- Mix thoroughly until it’s all combined and gooey.
Step 3: Add the Cotton Balls
- Drop in a few cotton balls into the mixture and stir them around until they’re fully saturated.
- Use chopsticks or tongs to remove the cotton balls and set them aside.
Step 4: Pour into Molds
- Carefully pour the hot mixture into your silicone mold.
- Let it cool completely. It should harden up nicely in about an hour.
Step 5: Pop Out and Wrap
- Once hardened, push the cubes out of the mold from the bottom.
- Wrap each cube in a 4¼” x 4¼” piece of aluminum foil, shaping the foil into a little “cup” around the bottom. This catches melting wax during use.
Step 6: Store
- Place the wrapped cubes into a Ziplock bag to keep them clean and prevent evaporation or mess during hot weather.
How Well Do They Work?
- Burn Time (without cotton balls): About 8 minutes
- Burn Time (with cotton balls): Over 16 minutes!
These tabs produce a strong, steady flame and are great for cooking, boiling water, or starting a fire .
How to Use a DIY Fuel Tab
- Unwrap just the top of the aluminum foil, keeping the cup shape on the bottom.
- Place it in your solid fuel stove or a fire-safe container.
- Light one corner of the cube with a match or lighter.
- Shield it from the wind with a windscreen or a simple piece of foil.
- Set your pot or cup on top and let it do its thing.
These DIY fuel tabs are an awesome addition to your bug out bag, car kit, or camping gear. They’re cheap, long-burning, and easy to make with stuff you might already have around the house.
Be sure to check out Waypoint Survival for more survival tips and tutorials.
Like this post? Don’t Forget to Pin It On Pinterest!
You May Also Like:
Read the full article here


